Boulle marquetry or Buhl-work, as it is ofter referred to, is named after the 17th-Century French ebeniste who propagated its use. In simple terms, it is the use of two contrasting veneers which when cut produce 2 inverted patterns of similar design and size. These materials in the past were most often brass, tortoiseshell, pewter, silver and ebony. Today we find brass and wood veneer popular choices in the creation of new work. It is important to note that all brass marquetry, except for brass inlay, is always classified as Boulle.
The method by which Boulle marquetry is made is elementary in theory, but complex in execution for those with no prior marquetry experience. A prerequisite to the Boulle technique would be the "classical" or pad method and would provide a practicable foundation on which to build. Because of the number of layers and the hardness of said materials, no other method is possible in creating Boulle marquetry.

In the example below 2 contrasting veneers are used - brass and faux ebony. In selecting the veneers it is advisable to have the harder of the two slightly thinner than the other to make the finishing process easier. To begin the materials must first be prepared. Newsprint is glued (hide glue is preferred) to the face side of the ebony. Our intent is to consolidate the veneer during cutting. The brass is readied by scoring the backside with a toothing plane. In the absence of such a tool a paint scraper with a piece of a hacksaw blade attached will suffice. Stroking the brass diagonally in opposite directions will provide a good surface to glue upon.
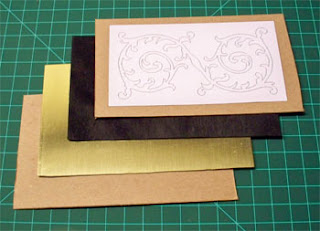
Once the veneers are prepared 2 additional waster veneers are needed. The first for the top to which the pattern will be glued and the second for the bottom to absorb burrs created by the sawblade. It is a good idea to place a sheet of wax paper between the brass and the ebony to help lubricate the blade. Since the brass is more rigid than the veneer it is placed below the ebony. All this is assembled in a pad as shown below. The newsprint is left off in the photo to identify the ebony and the waster veneers are replaced by thin posterboard.
Compact the pad and tape its sides. If a larger pad is made it is advisable to make the pad oversize and glue or pin the edges.Sawing is to be carried out perpendicular to the sawblade. The blade itself should be a metal-cutting blade (jewelers saw blades are just right) with slightly rounded backs with fine teeth. Blade size is a compromise between how easily the blade breaks and the kerf it produces. As a general rule, as applied to hard materials, use a #1 blade for 1/40" or #4 for 1/28" veneers. These have 51 and 38 teeth per inch respectively.

To begin sawing the pad a hole must be drilled so as to thread the blade. This is usually drilled in a corner or where 2 intersecting lines meet. Use the smallest possible drill that will accept the blade. Numbered drill sets in the #61-80 range are perfect. Sawing is carried out with a fretsaw or power scrollsaw as illustrated. It is useful to lubricate the blade frequently with a stick of beeswax to facilitate radial cutting. It is not uncommon, however, to break a blade here and there. That is just the consequence of the material being cut.

When the pad has been cut separate the various layers. Be careful of fragile pieces. The top and bottom wasters can be discarded. What remain are 2 reversed copies of the original pattern. These are then glued face down upon a piece of kraft paper with rubber cement or wide blue painters tape. Make sure the scored brass is on the back side and the papered ebony on the face side. The idea is to hold the pieces together and yet to allow them to be positioned securely to the substrate when in the press. Voids created by the thinner brass will be displayed on the face side. Glue is prepared to match the color of the ebony by mixing a pinch of black, water soluble aniline dye. It is then glued to the substrate on one side and a counter veneer on the other. After the glue has cured it is removed from the press. Using a scraper the newsprint is removed and the ebony cut down level with the brass.

This is an elementary example of what can be achieved with the Boulle method. More advanced designs can be made by expanding on the above and any combination of materials are possible including those not mentioned such as pearl, faux ivory and bone. If it is available in thin veneer-like sheets, it can be used in Boulle marquetry.


